Compounding Self-Hosting
Combining Immich, Home Assistant, and an e-ink screen for truly personal tech.
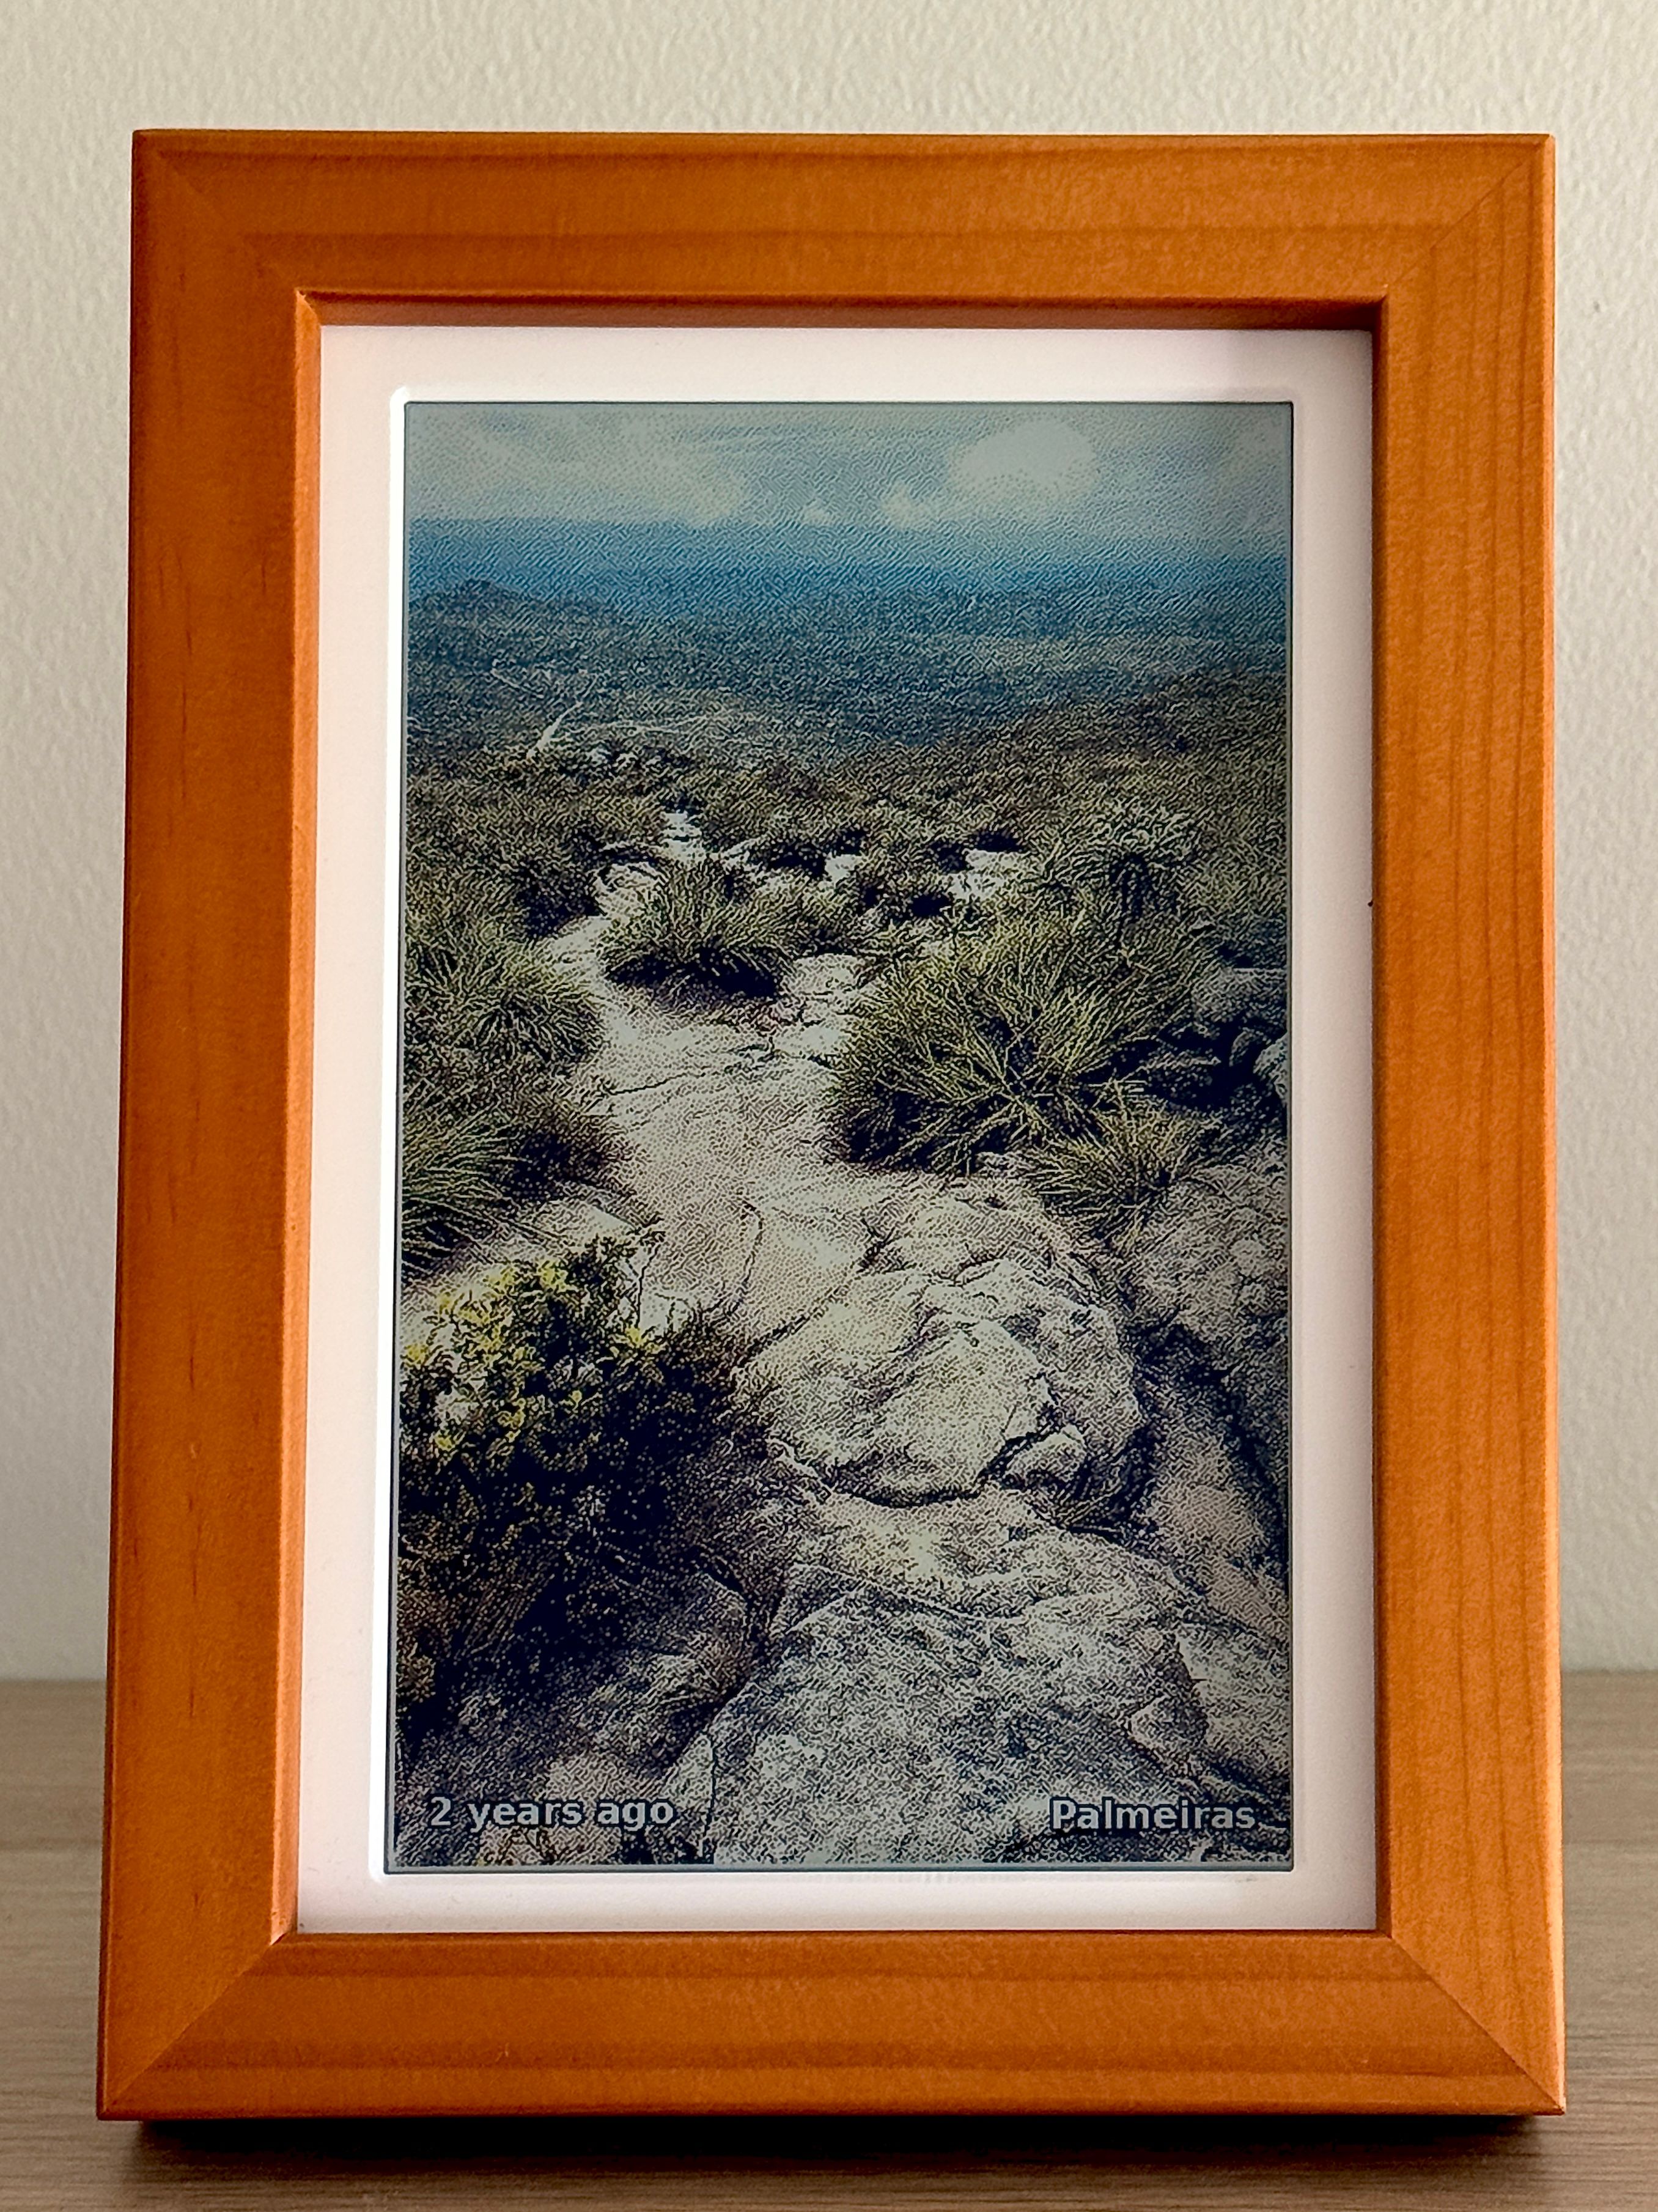
I built a small e-ink photo frame for our home. It pulls photos from a self-hosted Immich1 library, which has already run face detection and geocoding on them. It checks a self-hosted Home Assistant2 instance to see whether anyone is home, then displays a photo on the PhotoPainter3 for everyone to enjoy.
Why
Most digital frames offer a choice between two bad options: preprocess the photos and copy them to an SD card yourself, or hand your library to a cloud service like Google Photos. Realistically, the SD card gets updated once a year, and I’d rather not give a cloud provider access to my most cherished memories.
Yet I’d imagined that coming home to a photo from earlier that day, or one from five years ago, would feel different if it were in a real picture frame instead of buried on my phone. So I decided to spend a weekend building a personal version with Claude Code. I experimented with dithering and post-processing, fine-tuned the photo-picking algorithm, and ended up with this project.
It only took a weekend because so much came for free. Immich had already detected faces in every photo and reverse-geocoded the place names shown on the overlay, and it knew which photos we’d marked as favourites. Home Assistant already knew who everyone was and who was home. That’s the compounding return of self-hosting: every service exposes an easy-to-integrate API, and each new project gets to stand on all of them.
How it works
The frame is driven by a Raspberry Pi Zero 2 W, which is way overpowered, but at least it’s fast enough to let me write plain Python and mostly ignore performance. A cron job runs a script every 15 minutes. Each run:
- Quits if it’s between midnight and 7 am. The e-ink display holds its image without power, so the last photo of the evening simply stays up overnight.
- Asks Home Assistant whether anyone is home. If not, it quits; there’s no point wasting power and straining the display.
- Picks a random photo from Immich, drawn from four overlapping pools: “on this day” memories, favourites, the last 30 days, and the whole library. A rolling 7-day history log prevents repeats. Photos matching the frame’s orientation get 4× the weight, while any candidate whose crop would clip a head is rejected (more on that below).
- Crops around any detected faces, boosts contrast and saturation (e-ink is short on both), dithers the image down to the six-colour palette, and pushes the result to the panel. The photo’s age and EXIF location are painted into the bottom corners as white text with a black stroke, so the dither can’t smear the edges.
Image pipeline
The final look depends most on two choices: how the image is cropped around faces and how dithering is applied.
Cropping
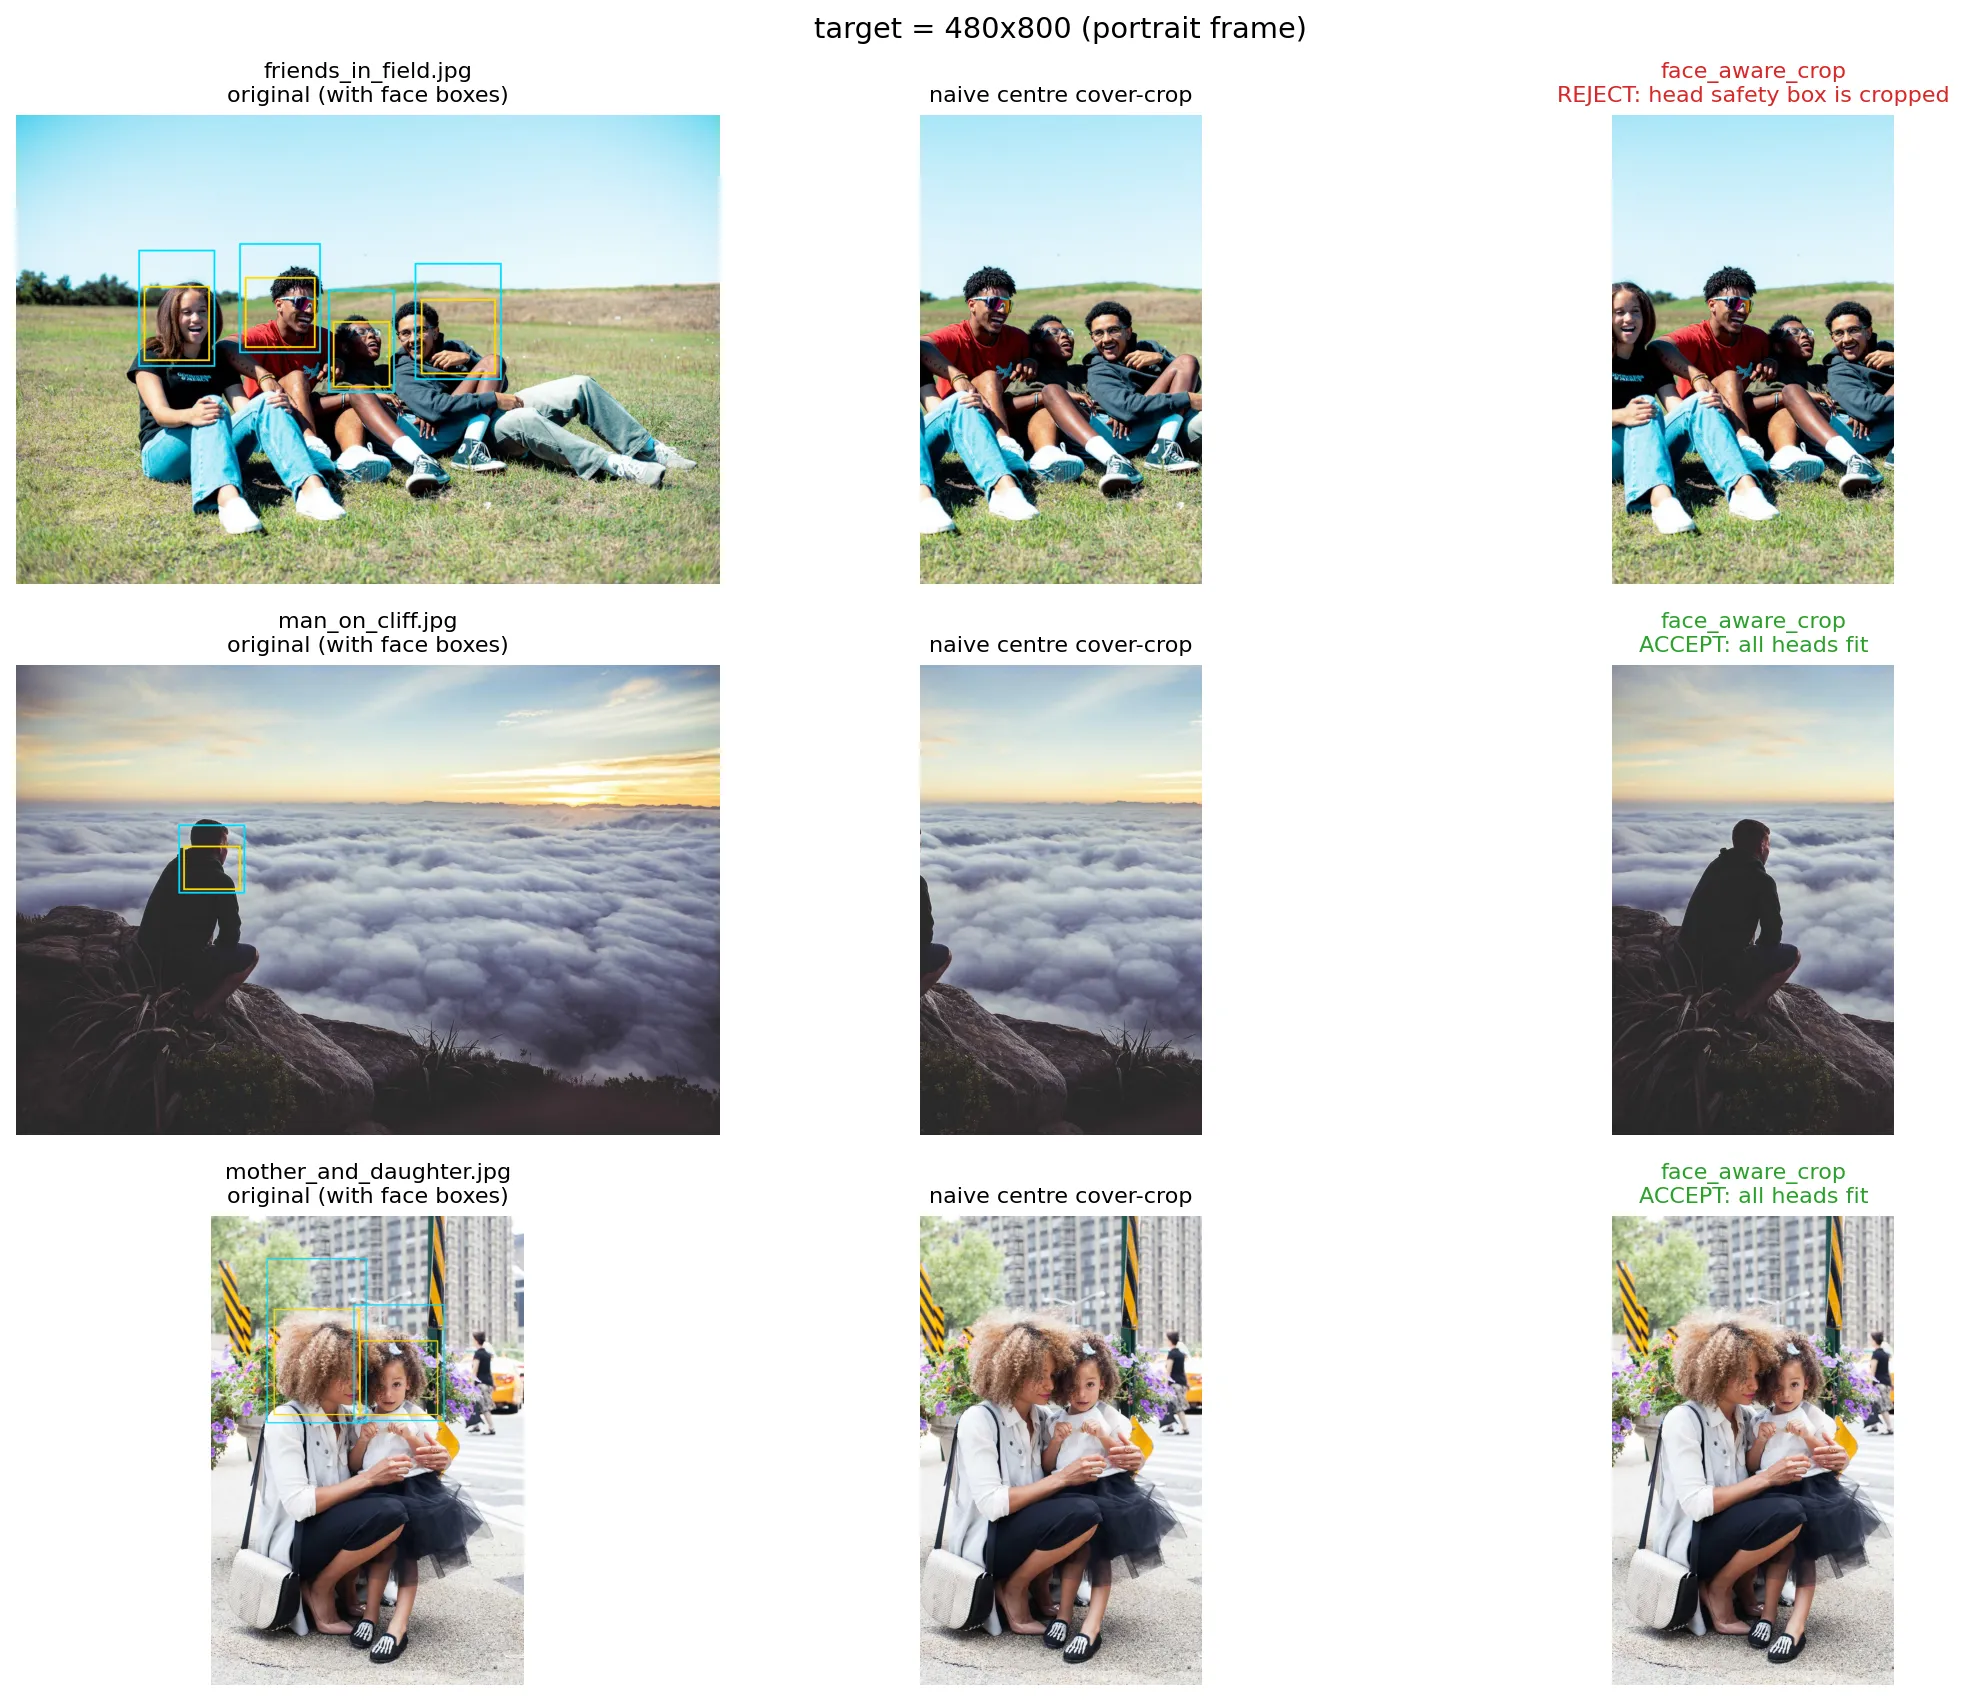
The photo frame stands in one orientation, but I didn’t want to limit it to photos that happen to match. A face-aware algorithm therefore resizes and crops each image to fill the panel, biasing the crop window towards faces Immich has already detected. A landscape shot with some room around the subject will often crop cleanly to portrait this way. If the crop would cut into a head, the photo is rejected and the picker moves to the next candidate.
The examples below show how the head bounding boxes steer the final crop and which candidates get rejected.
Dithering
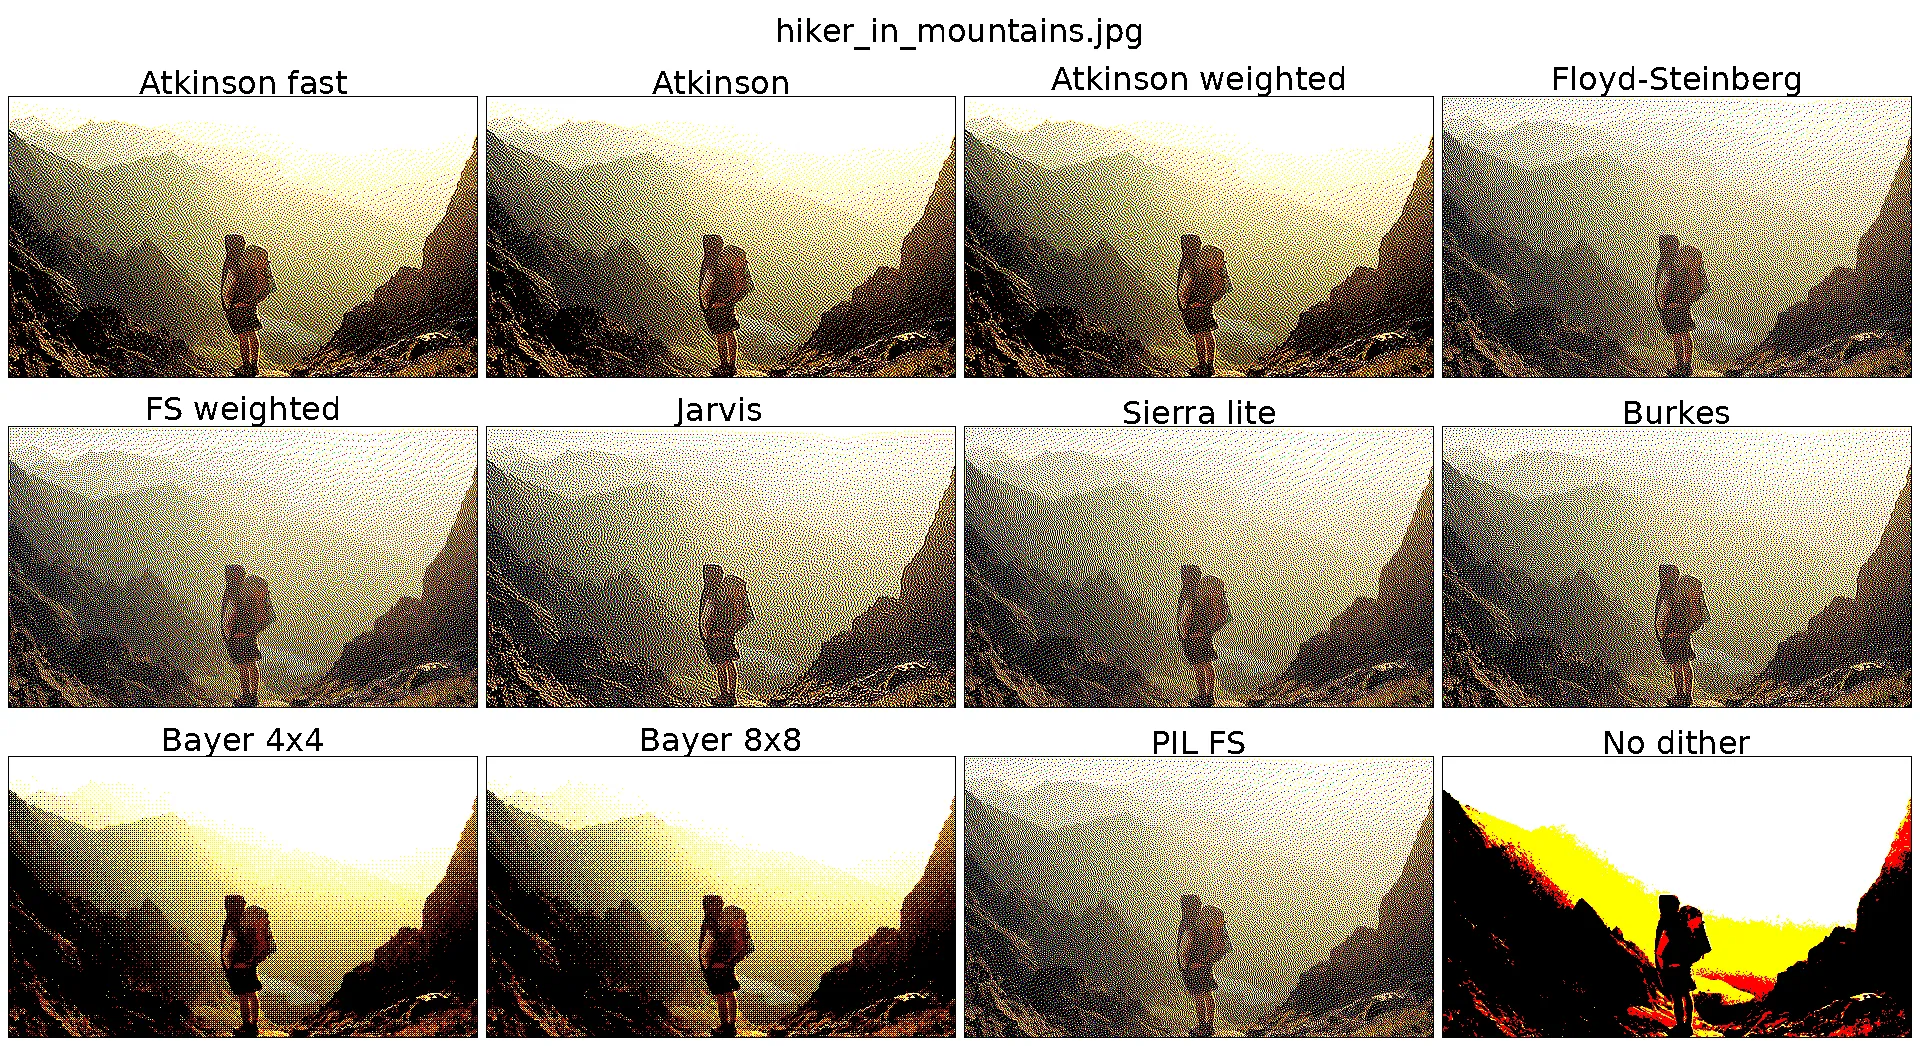
The panel shows exactly six colours: black, white, red, yellow, blue, and green. Unlike an LCD, it has no intensity control, so every pixel must use one of those six colours. Anything photo-like has to be dithered, and the available algorithms differ wildly in output quality and running time. Here’s how a few of them compare:
I settled on Atkinson dithering4, which preserved the most contrast without too many visible artefacts. Unlike the alternatives, it diffuses only 6/8 of each pixel’s quantisation error, so highlights stay bright instead of being dragged grey by their neighbours. Dithering was also the first part of the pipeline where pure Python became unusably slow on the Pi. The inner loop5, including perceptually weighted nearest-colour matching, is therefore JIT-compiled with Numba6. Once the cache is warm, it runs roughly two orders of magnitude faster.
Learnings
The Pi Zero 2 W is overkill. It drains a battery far too quickly: it wastes power sitting idle for most of its life, waiting for the next cron tick. An external RTC-controlled power circuit could have fixed that, but I couldn’t be bothered to hack one in. For a battery-powered build, I’d use an ESP32 with deep sleep instead. With 15 minutes between refreshes, even a slow chip has plenty of time for image processing and dithering.
A few reliability quirks are worth mentioning. In my setup, the Zero 2 W’s Wi-Fi connection drops when power saving kicks in, so a separate cron job runs wifi-check.sh every 5 minutes to reconnect. I also masked swap and set journald to volatile because SD-card wear is the only thing likely to slowly kill the frame.
For the next frame, I’d like to try an Inky Impression7 in a custom enclosure, with a larger display and perhaps integrated lighting. E-ink looks a little muddled in evening light, so a dedicated light source would be the biggest improvement by far.
All in all, the frame already does its job. It stands in the living room as a pleasant speck of curiosity, subtle enough that most visitors never notice it until I inevitably point it out. Once you know it’s there, catching the panel mid-refresh brings a small rush of excitement.
- Immich: https://immich.app/↩
- Home Assistant: https://www.home-assistant.io/↩
- PhotoPainter: https://www.waveshare.com/wiki/PhotoPainter↩
- Atkinson dithering: https://beyondloom.com/blog/dither.html↩
- inner loop: https://git.schmelczer.dev/andras/frame/src/commit/c0c2b779d7b43793b594b9c52b694133859edfd8/src/lib/waveshare_epd/epd7in3e.py#L59-L109↩
- Numba: https://numba.pydata.org/↩
- Inky Impression: https://shop.pimoroni.com/products/inky-impression?variant=55186435244411↩